More than 7 years ago, one of my customers asked me to organize an e-learning authoring workshop. The purpose was to empower the team leaders of people working on an assembly line to create short e-learning courses about very hands-on subjects. Their IT department recently had purchased iSpring licenses, so that was the tool to use for the development.
I was truly impressed that at the end of the day, “e-learning newbies” walked out of the class with a course that was ready for production.
So, after all those years, I was happy to get the opportunity to evaluate the latest version, iSpring Suite 9.7
Concept
iSpring Suite is not a stand-alone authoring tool: it uses Microsoft PowerPoint and adds tons of typical “e-learning” features to it. Simply calling it a “PowerPoint add-on” would not do it much right: it is a true “suite” because after installation you get several different applications. Some of them can be used independently, but the main activity will still happen in PowerPoint.
Some experienced e-learning developers might see the tight integration with PowerPoint as a disadvantage, because it limits the canvas, and you are tempted to create “slide based” content (sequential page turners), but on the other hand, it empowers people with less e-learning authoring experience to produce interactive content in no time.
In times where information is rapidly changing and content production needs to be “just in time”, the fact that any subject matter expert with good PowerPoint skills can easily produce course content is a huge advantage.
Installation
iSpring is only available for Windows (Windows 7 or higher, PowerPoint 2007 or higher), so unfortunately not on MacOS. Pricing is very reasonable and is a yearly fee per user.
“There is nothing I can’t do with PowerPoint”
The feature set of the latest versions of PowerPoint is so rich that it is maybe hard to imagine that there is something that PowerPoint can NOT do. Still iSpring manages to add several features that make the production of professional e-learning content much easier:
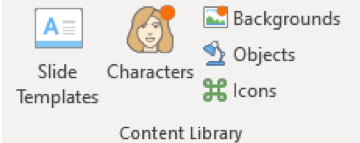
Content Library: an extensive library of backgrounds, cut-out characters, icons, templates complement the existing PowerPoint clip art
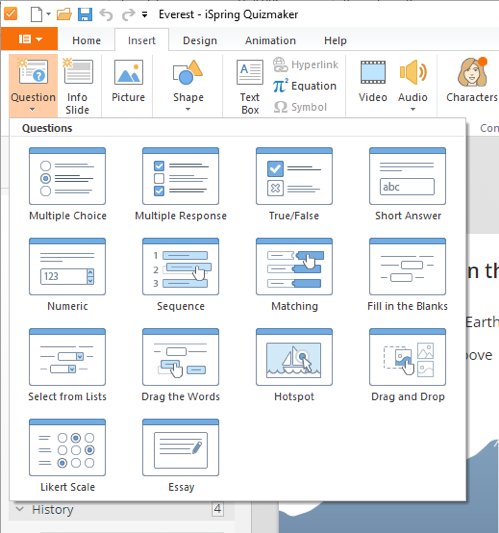
Quiz: iSpring Quizmaker has a really impressive feature set with multiple question templates, question pooling, branching, flexible feedback and scoring options… It is good to know that you can also use it independently of PowerPoint and publish your quiz to SCORM or another learning standard. The output is fully responsive, so ideal for a quick mobile assessment or a survey.
Enhanced audio/video recording: you can already record narrations with PowerPoint, but iSpring brings it to the next level with a microphone setup wizard, noise reduction, webcam recording and an Audio-Video editor that makes post-processing of your narration much easier. iSpring Cam Pro records your screen and/or your webcam and can produce stand-alone recordings that can be published directly to YouTube.
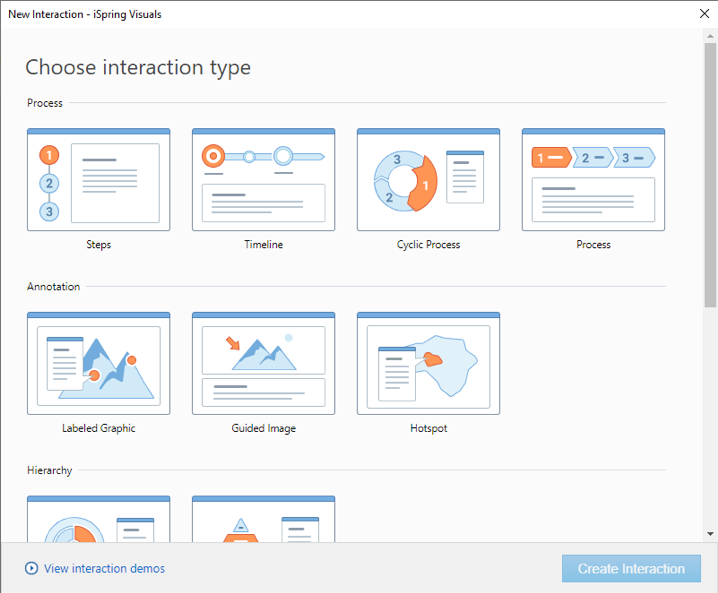
Interactions: iSpring Visual lets you select one of the 14 different interactions. They are especially useful if you want to break the “page flipping” and engage your learner with a “do it yourself” activity.
If you would prefer using an external tool, you can use the “Web Object” to integrate a web site or an embed code easily in your presentation.
Dialogs: iSpring Talkmaster is a conversation simulation editor. It allows you to script a dialog with complex branching scenarios; it can be very useful in courses on communication, negotiation skills, sales pitches…
Output (publishing)
When your course is ready, you can publish it directly from PowerPoint in multiple outputs:
- Local file (html5 or video)
- iSpring Cloud or iSpring Learn (the iSpring LMS solution)
- LMS (SCORM 1.2, 2004, AICC, xAPI or cmi5)
- Youtube
Because the output is based on PowerPoint, the rendering on mobile devices is an attention point. PowerPoint slides simply scale to the size of the screen and are not truly responsive, unlike the “iSpring content” like quizzes and interactions, which are adapted on mobile.
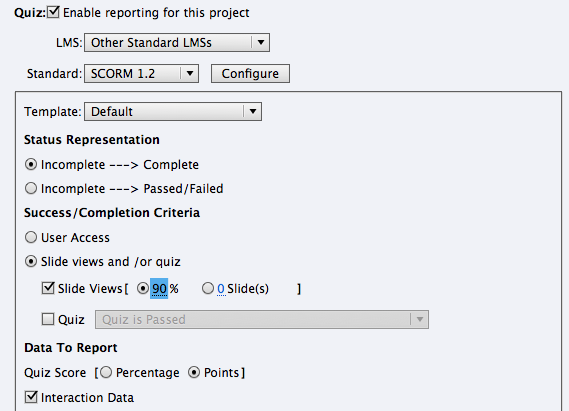
In the SCORM output (which is still probably the most popular output), the completion and scoring options can be adapted, which is a real plus to get the correct tracking information in your LMS. You rarely find these options in other authoring tools.
When published, the course is embedded in a player (navigation, resources, course outline…) that can be customized with author information, a custom logo…
What else?
iSpring Flip deserves a special mention, as I have been looking for a long time for a tool that can easily create a SCORM package from a Word or Pdf document. My quest is over, this is exactly what it does: you open your Word, PDF or PowerPoint, publish as stand-alone HTML or as a (SCORM or others) package to your LMS.
When published to an LMS, it tracks the progress of the learner in the book. Unfortunately, it does not seem to track the time spent but hey, you can’t have it all.
iSpring Cloud is a small hosting solution that allows you to publish your course online if you don’t have an LMS (or just want to make your content public).
Conclusion
iSpring Suite 9.7 turns PowerPoint into a very powerful desktop authoring tool. It is the ideal toolset for trainers, subject matter experts, product specialists… to add the necessary interactivity to their already existing material and produce standards-compliant courses that can easily be published online or integrated into any LMS, without a steep learning curve.
More info
- iSpring Suite: https://www.ispringsolutions.com/ispring-suite
- iSpring Suite pricing: https://www.ispringsolutions.com/pricing
- demos of iSpring generated content: https://www.ispringsolutions.com/ispring-suite/demos